


Spark Blueprint™ is an easy-to-use tool for room planning and high-quality visualization. This user guide holds the basic knowledge needed to use Spark Blueprint™ in an effortless way.
Spark Blueprint User Guide
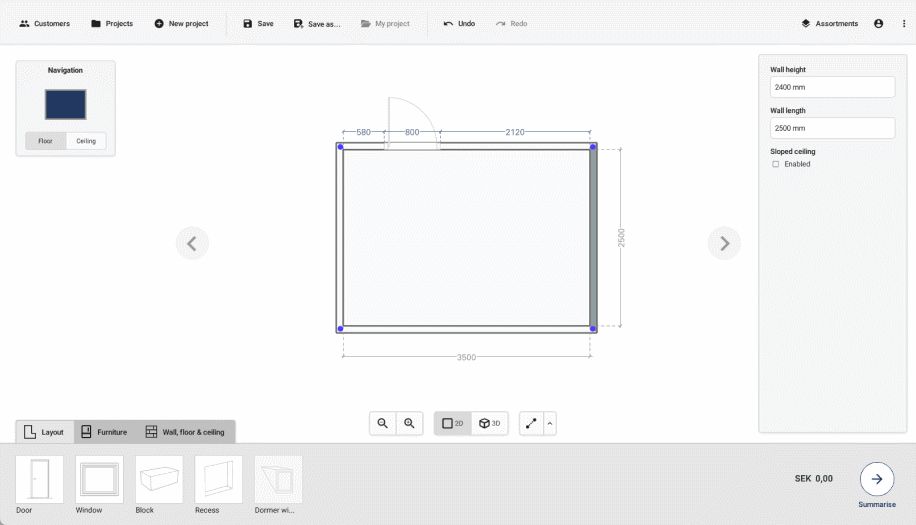
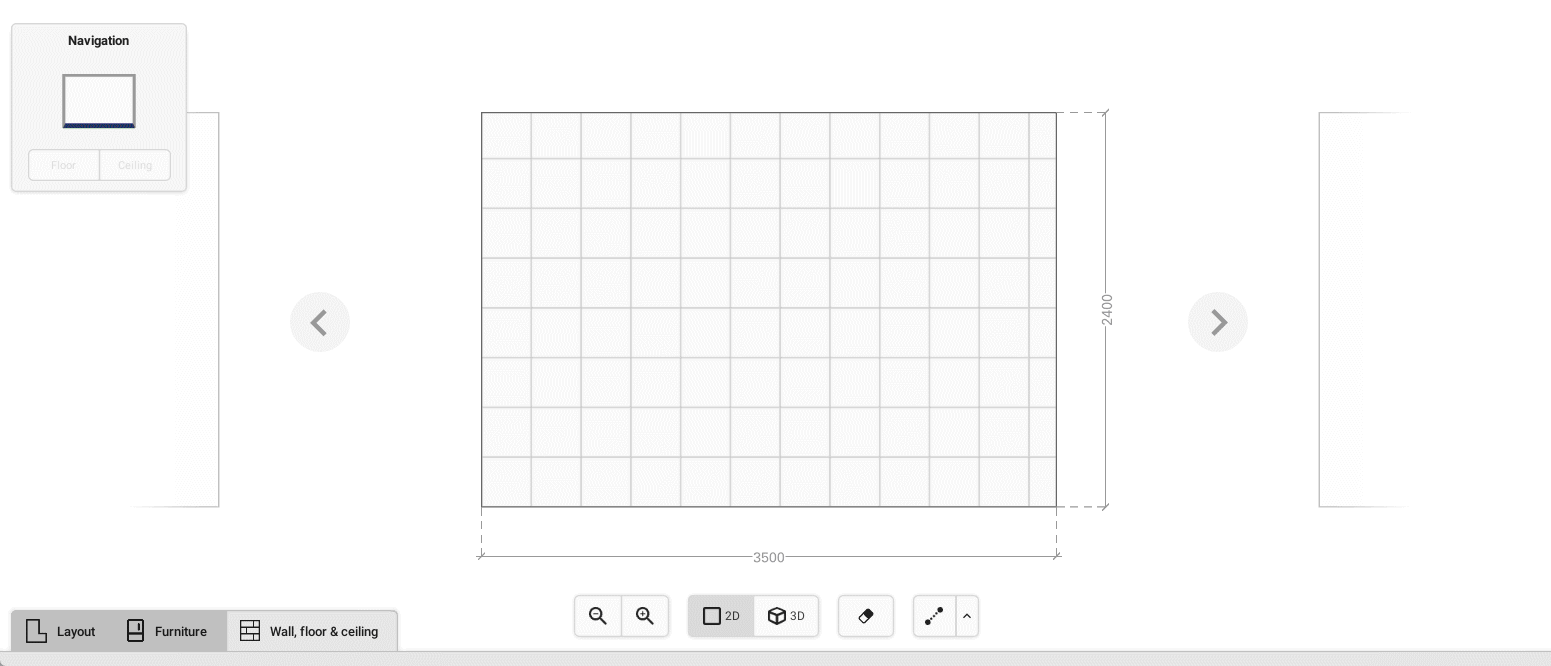
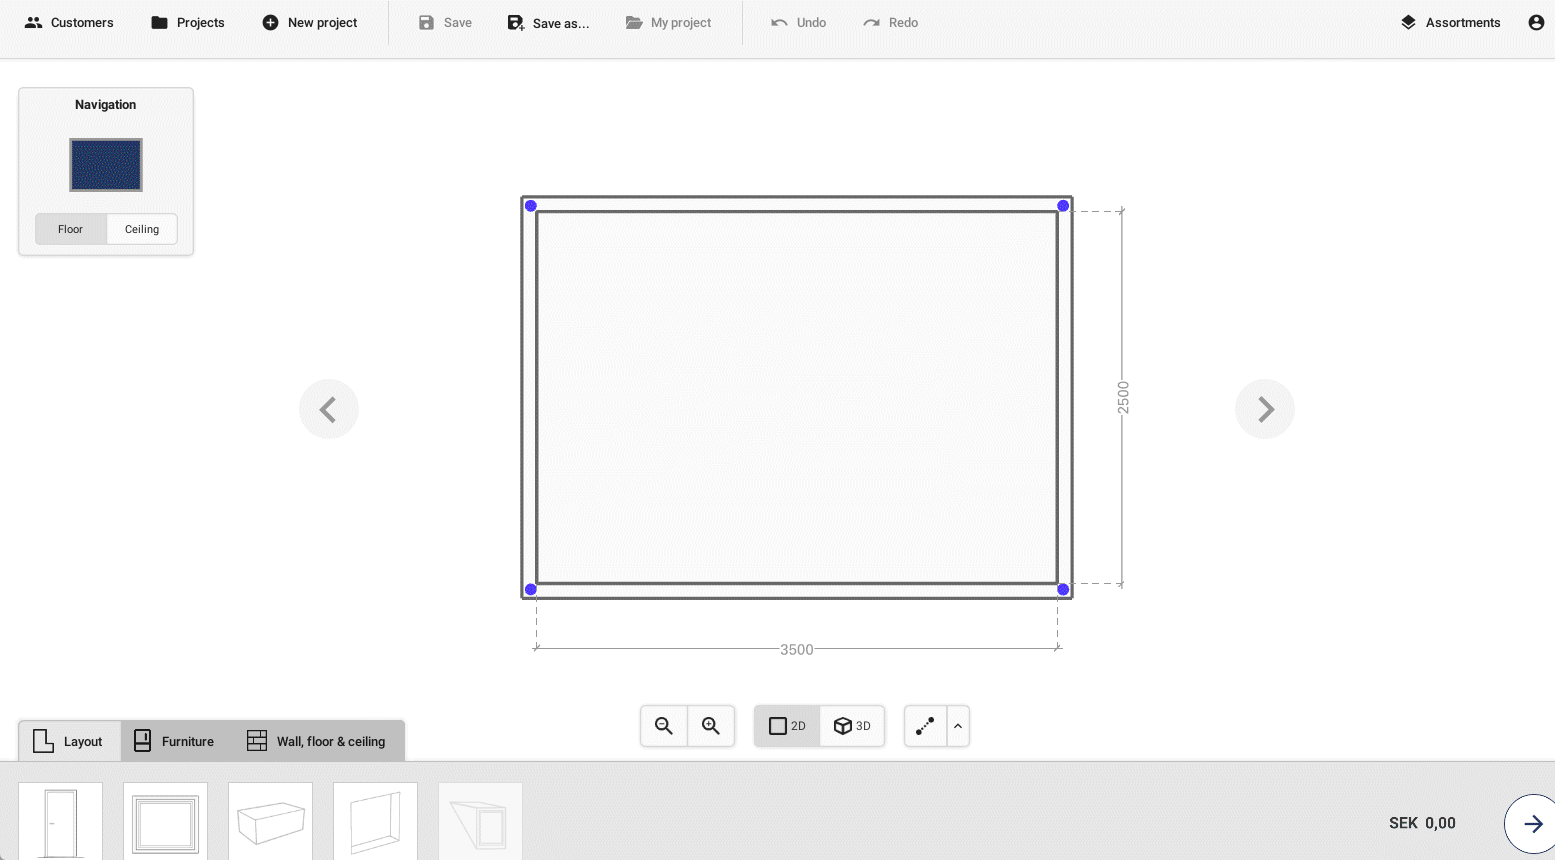
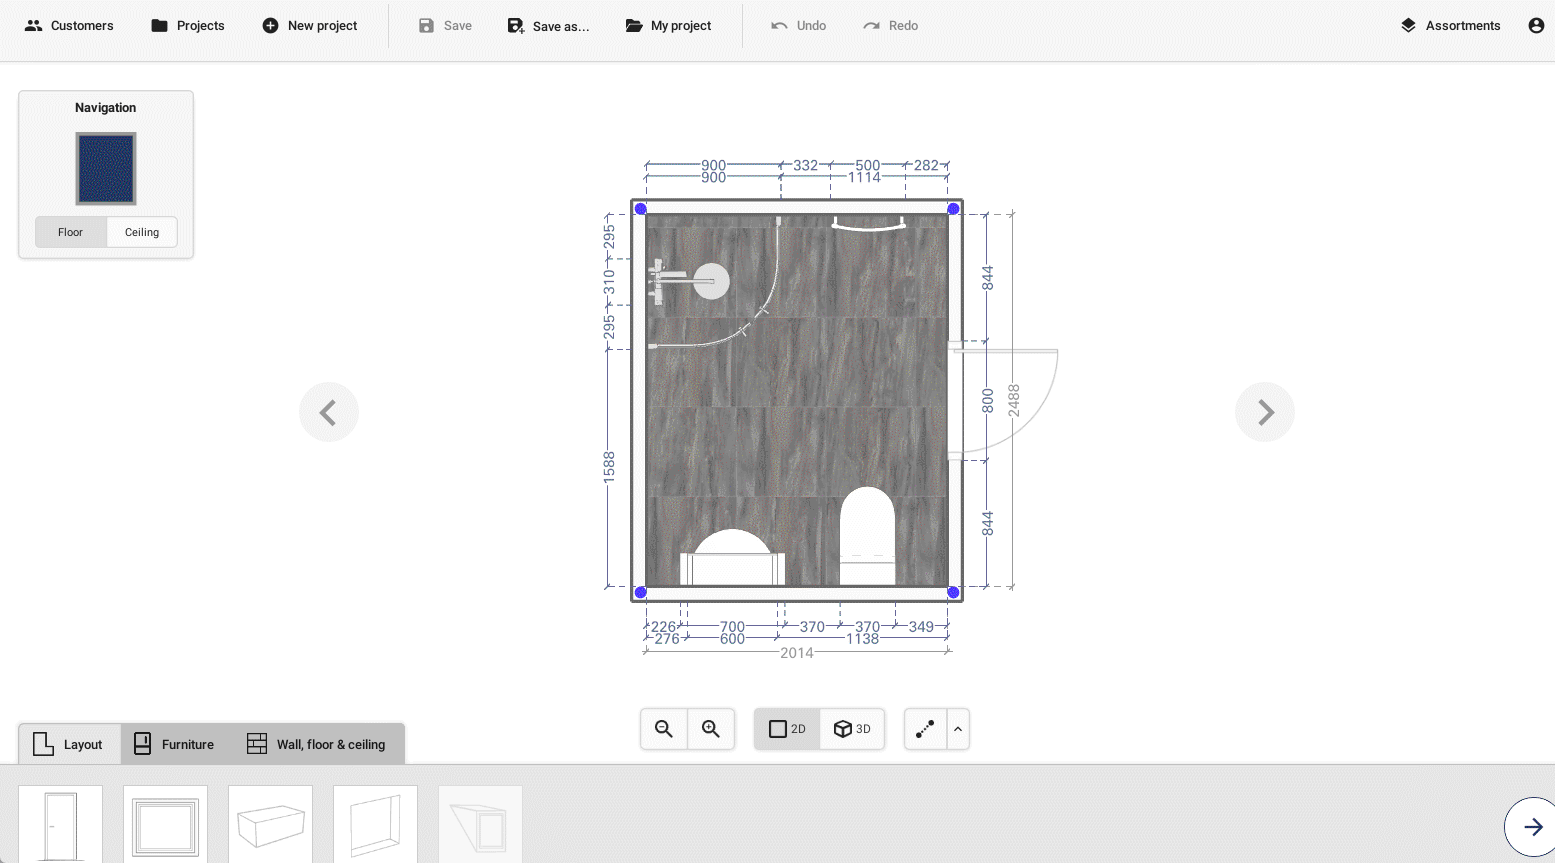
Interface overview
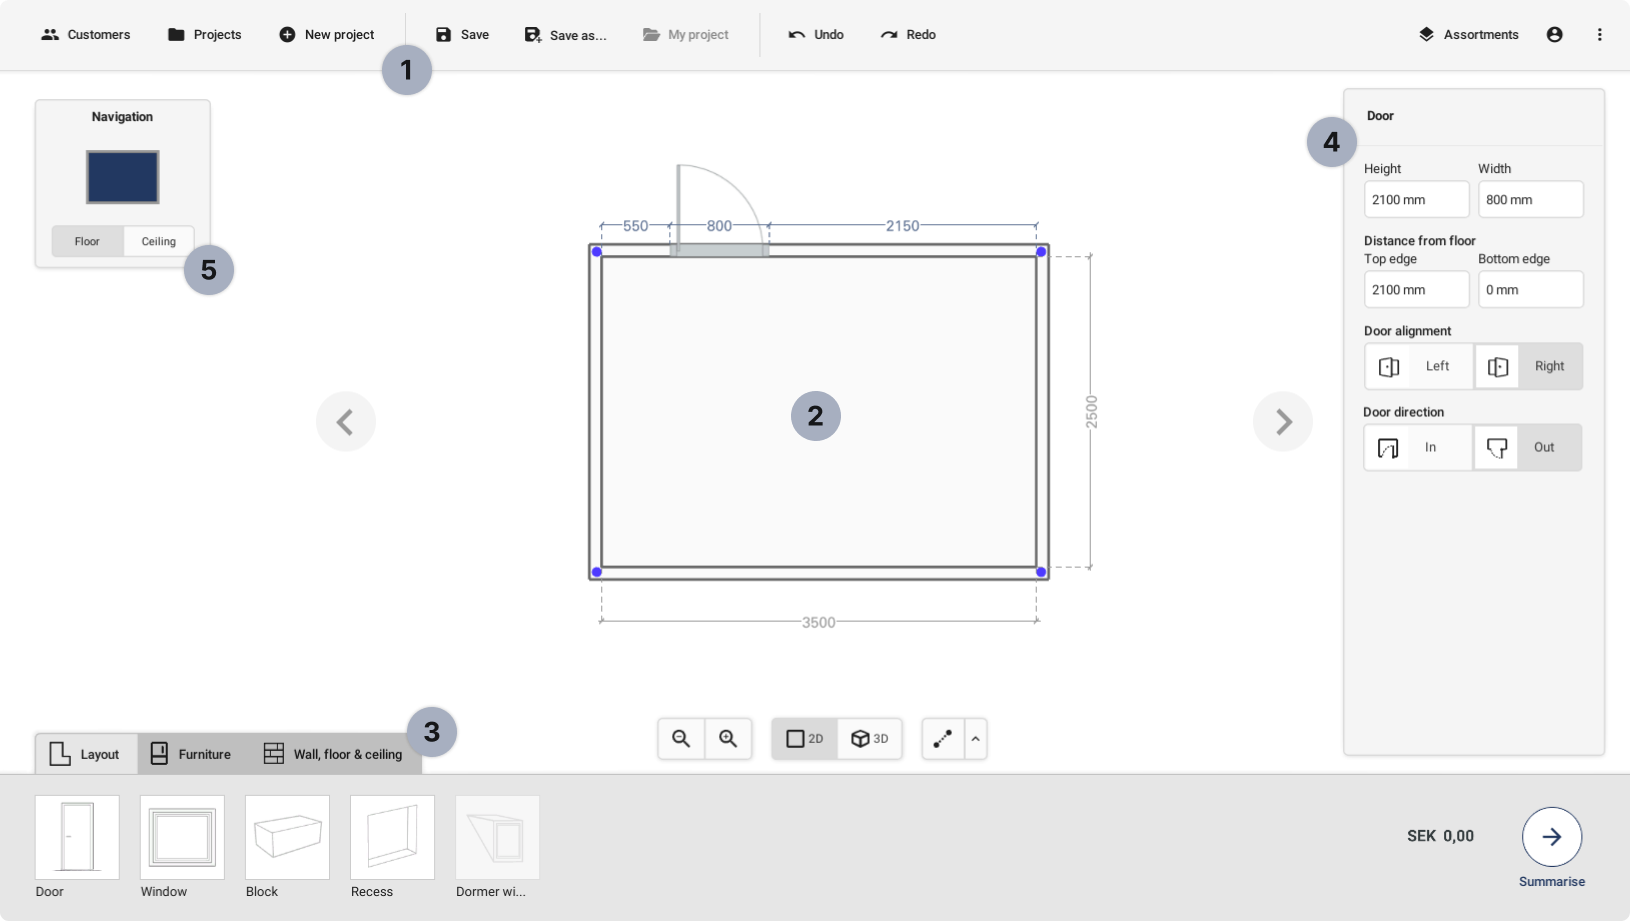
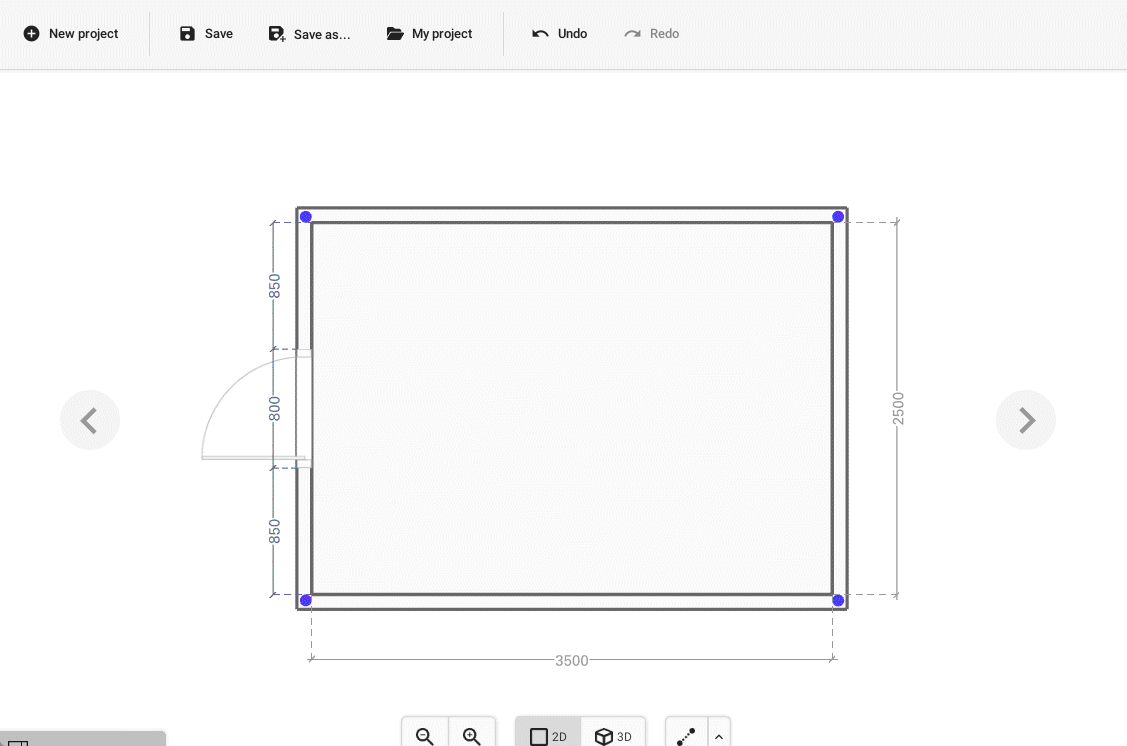
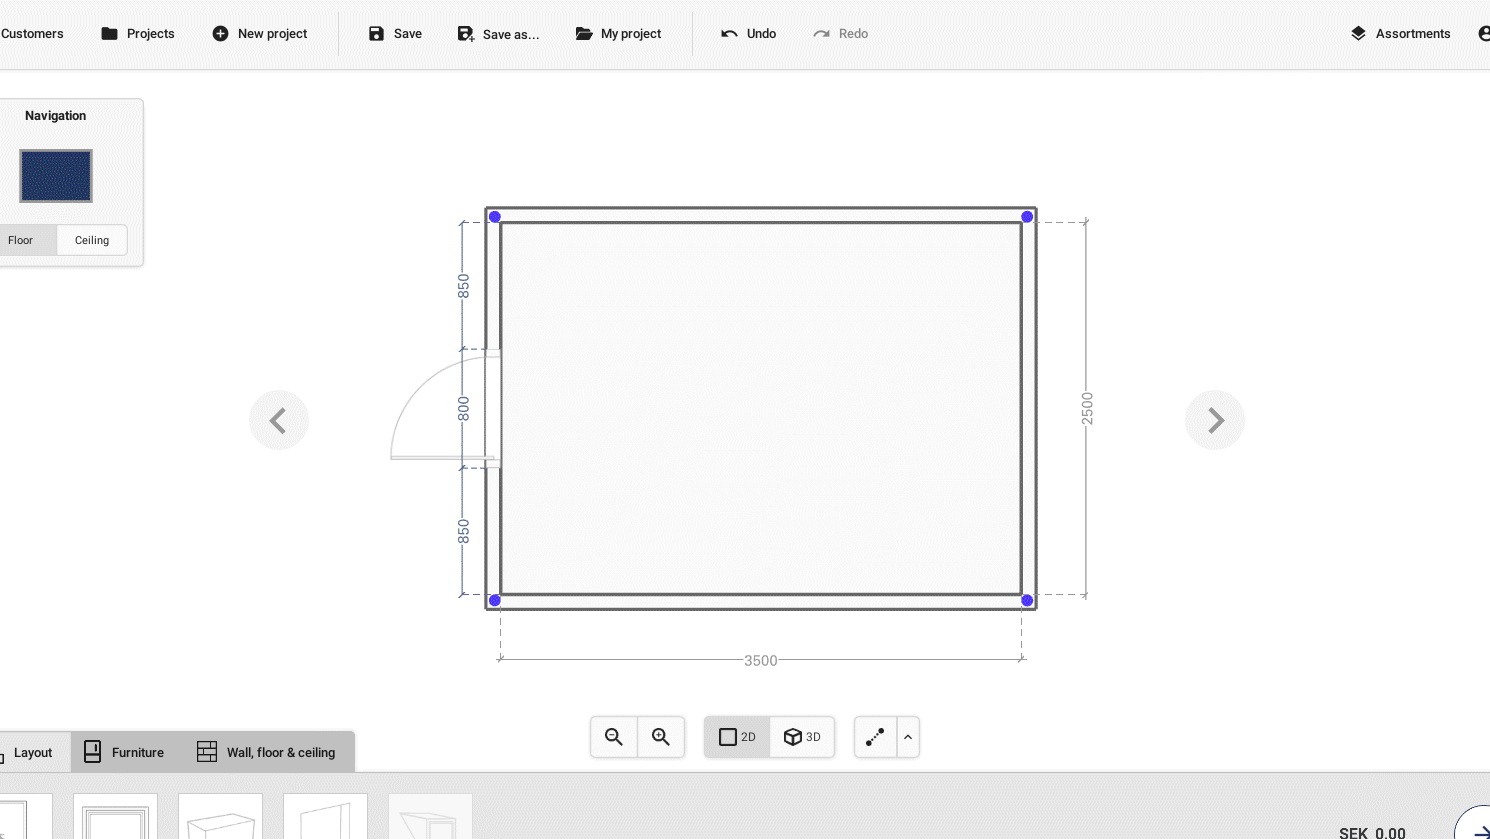
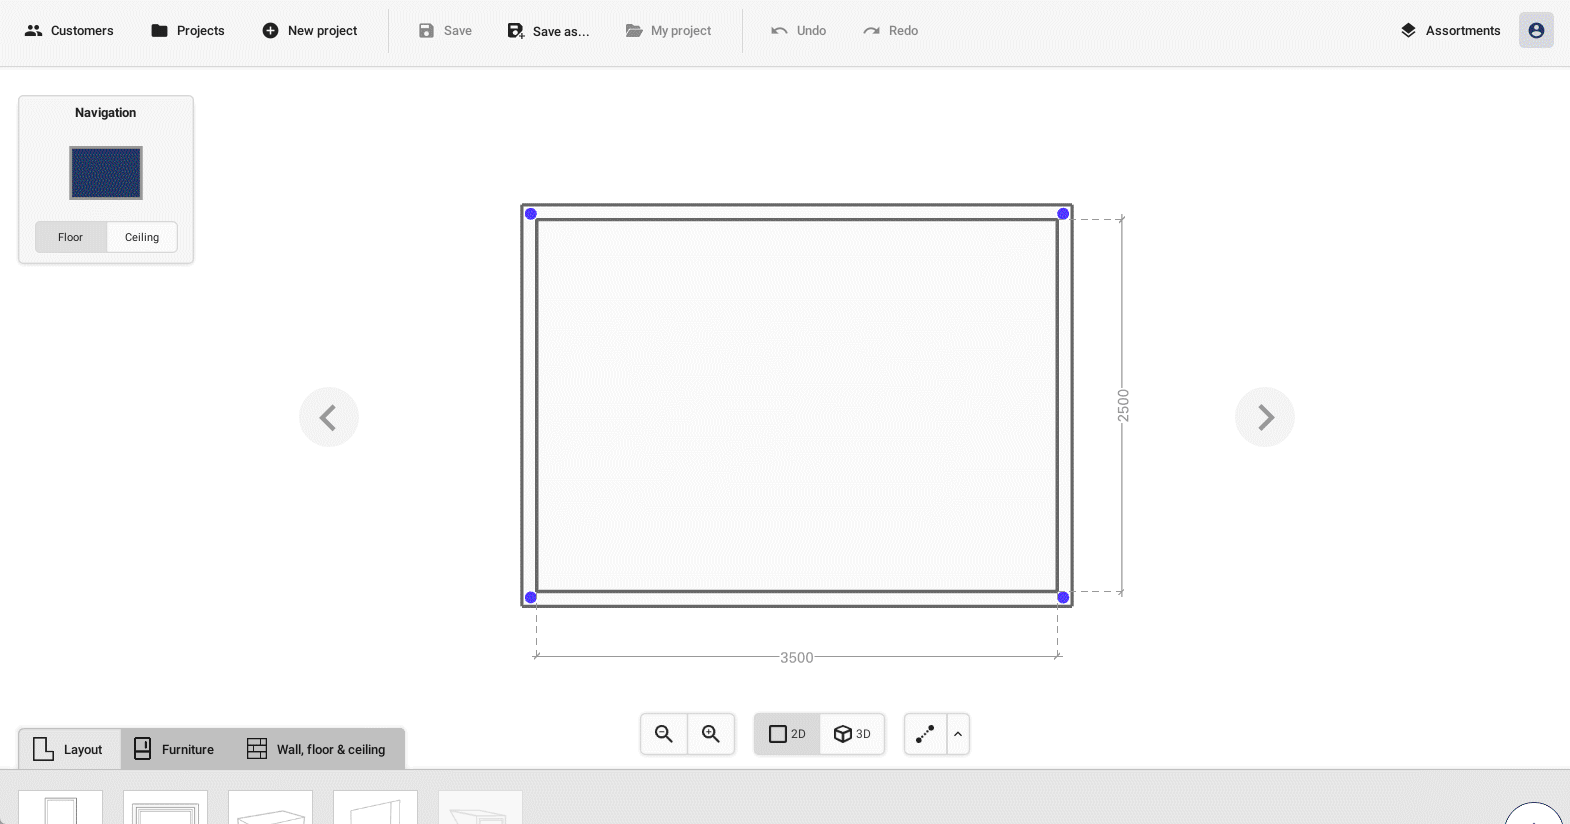
1. Control bar
The Control bar gives access to actions such as saving, creating, and loading projects, as well as viewing the currently active project. Undo and redo actions is also accessed from here. To the right the Assortment manager can be found, together with user account control, preferences, and help.
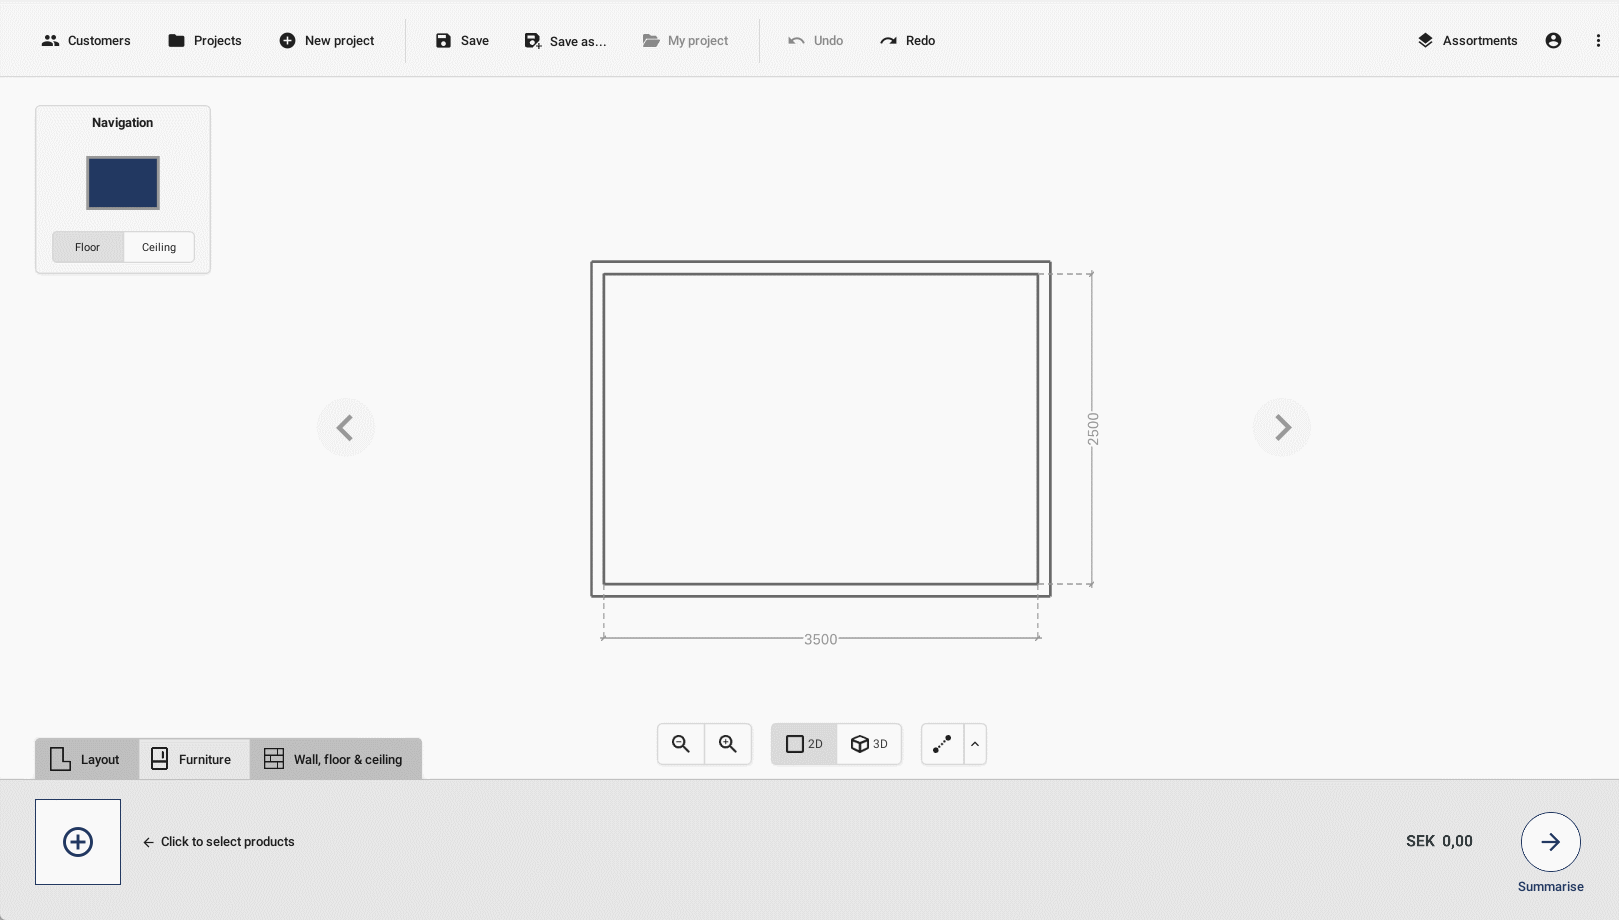
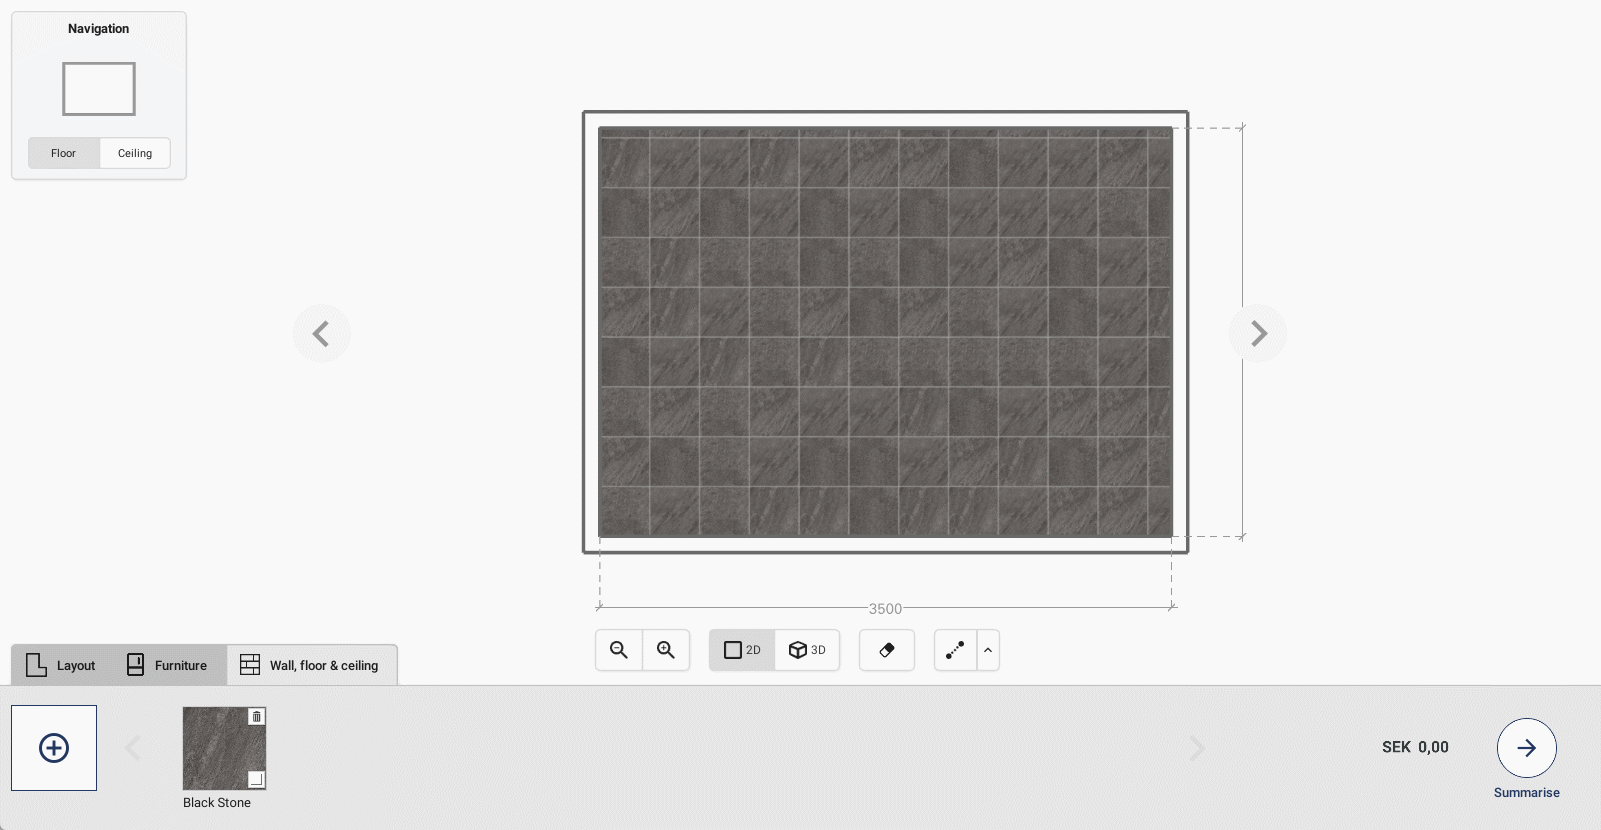
2. Drawing area
The Drawing area displays a view of the current drawing. By interacting with the drawing, it can be manipulated into desired shape. The bar underneath allows the user to zoom in or out, view the drawing in either 2D layout view or a 3D perspective view, and add measurements and annotations into the drawing.
3. Palette
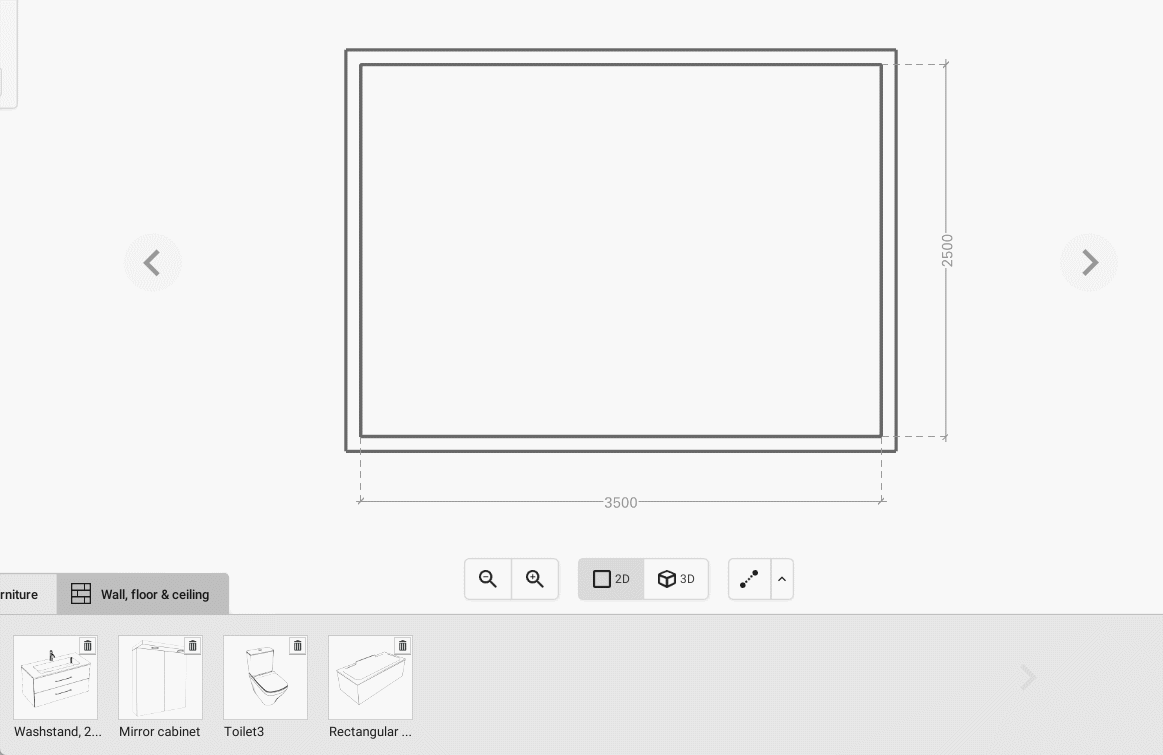
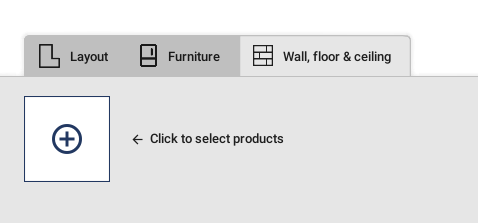
The Palette holds selected objects and products that can be placed in the drawing. There are three categories: “Layout”, “Furniture” and “Wall, floor & ceiling”, where the two latter ones are connected to the installed assortments which are accessed by clicking the “+”-button.
4. Option panel
Within the Option panel, the configurable properties of the currently selected object or product are shown. That can for example be placement, rotation, or color, although the properties available depends on the object.
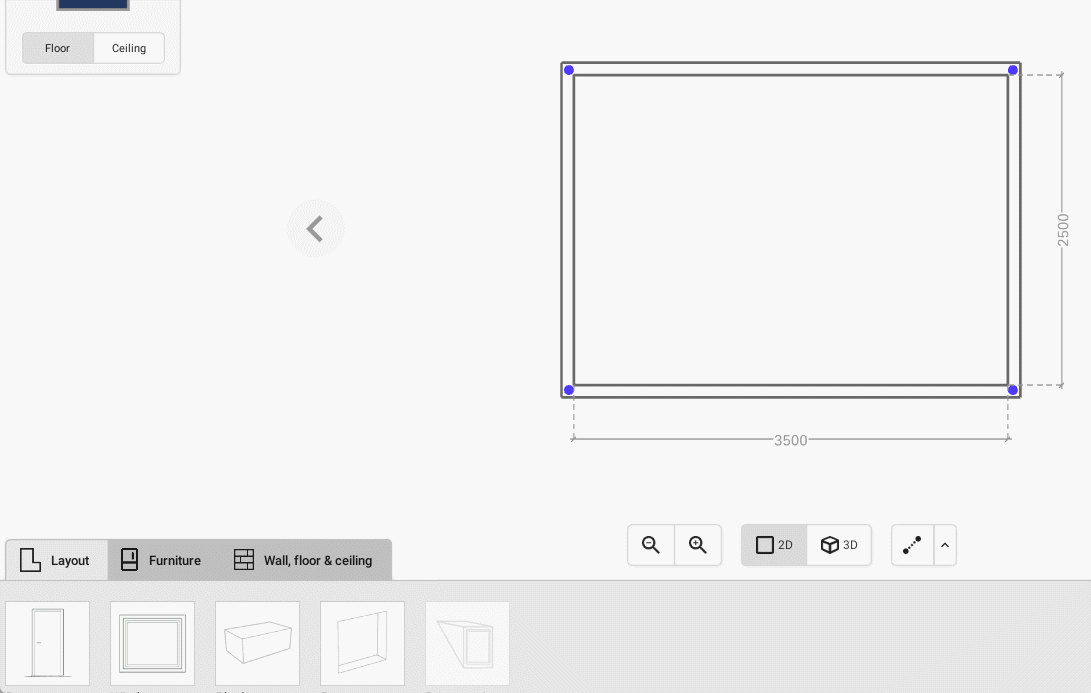
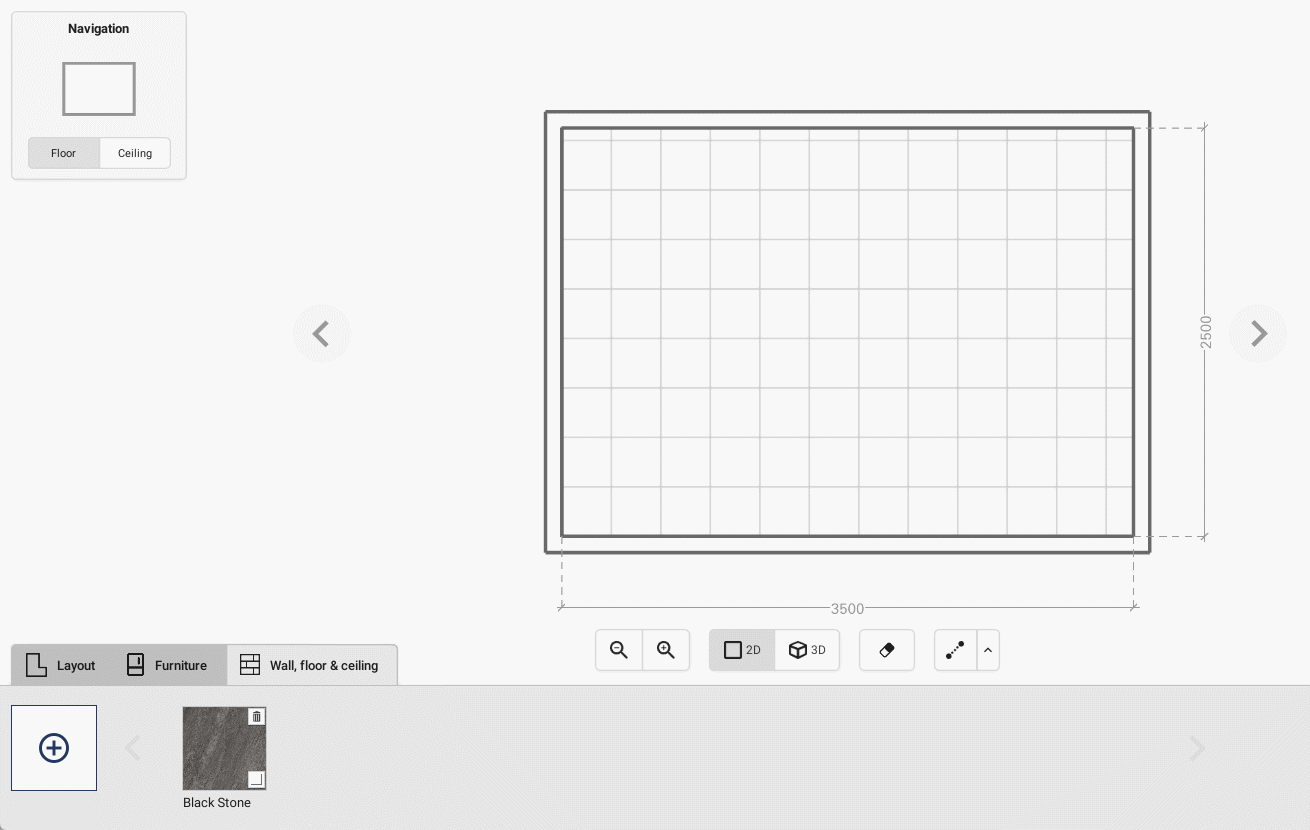
5. Navigation panel
The Navigation panel visualizes which surface of the drawing that is currently active. It also allows for easy access between either floor- or ceiling-view.
Getting started
Installing
The first thing to do is installing Spark Blueprint on your computer. If there is already an older version of Spark Blueprint installed on the computer, make sure that it is not running before you proceed with the installation process. To begin the installation, run the setup file that you have received through e-mail. If you have not received the setup file, please contact [email protected].
During the installation, you may be prompted to enter a password. If this is the case, the password requested is for Windows, NOT Spark Blueprint. If you do not have a password or if your password does not work you may have restricted access to your computer. In that case please contact your IT-department for help with installing Spark Blueprint.
Logging in
When the installation is complete and the software is up and running, you need to log in to Spark Blueprint. If you have received a password from Spark Vision Support, use that email to where it was sent to log in to your account. Otherwise you can create a new user account using your preferred email address.
Registering
If you have logged in using an existing account, the information in this section is not relevant and can be skipped.
If you have created a new account and logged in, you will be asked to register to get a license. Please fill out your contact information in the form fields, check the box at the bottom, and press the “Submit” button. It is important that the information you fill in is correct. If you think you may have entered the wrong information, please contact [email protected].
Downloading assortments
To use Spark Blueprint properly, assortments are required. Downloading and installing assortments is done with the Assortment manager and is accessed to the right in the top bar menu.
The Assortment manager lists all the assortments that are available. To use an assortment, you first need to download and install it. To download an assortment simply click “Add”, and once it has been downloaded you can click “Install”.
When there is a new version available of an assortment that you have installed, you will be notified in the Control bar. Note that an installed assortment can be set to automatically install any new versions of said assortment that come available. This is done by checking the “Automatic update” checkbox.
Creating a drawing
A Spark Blueprint Project consists of one or multiple Proposals, also referred to as drawings.
Creating a drawing is easy, and the first thing you need to do is modifying the layout before adding products, furniture, and structure to the room.
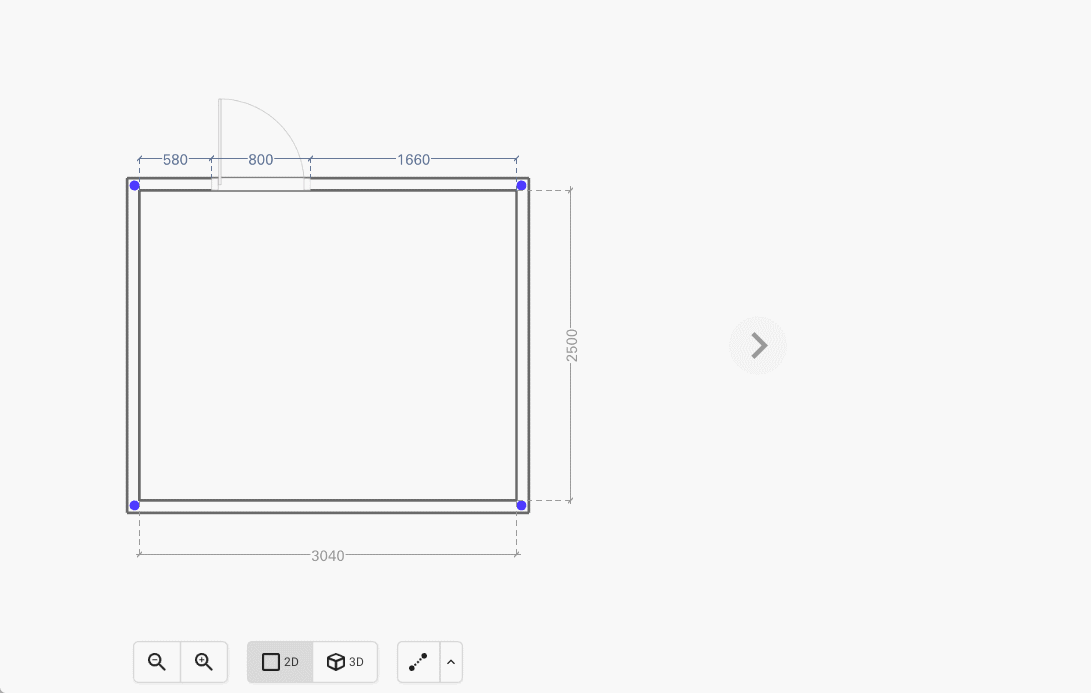
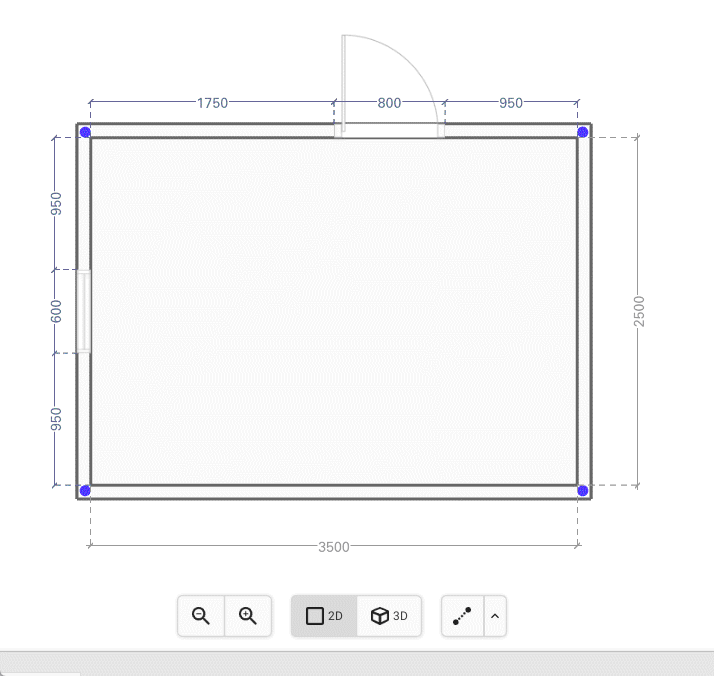
Modifying the layout
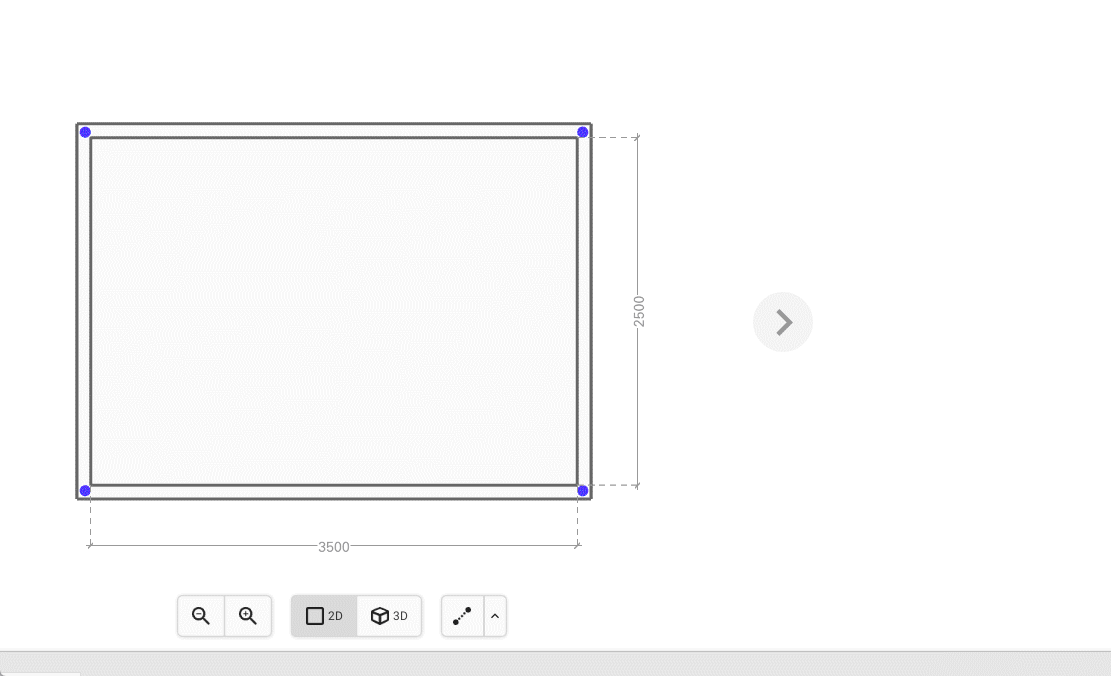
Start off by getting the measurements of your drawing right. Make sure the “Layout” tab is selected in the Palette.

Select the floor perspective in the Navigation panel by clicking in the middle of the drawing representation.

Basic actions
To make sure that the size of the drawing matches the room you want to create, the walls need to be modified. There are several ways to achieve this and they are described below.
Click and drag
To move the walls, click one one wall and drag without releasing the mouse button. You can also click to select the wall, and then click on it and hold while dragging.
Text input
It is also possible to change the properties of a wall in the Option panel. Click on the wall that should be modified and enter the desired numbers in the Wall length input box.
Arrow keys
Finally, you can fine-tune the placement of a wall by using the keyboard’s arrow keys. One press will nudge it 1 millimeter at a time. Hold down Shift while pressing the arrow to nudge it 10 millimeters at a time.
Select a wall by clicking and then changing the value “Wall height” in the Option panel.
Note that all walls in the room have the same height, so changing this value for one wall will change it for all walls.
If you want to add walls to your drawing, you need to add corner points and move them around.
To add a corner point, double-click on wall. To remove a corner point, double-click on the corner point itself. To move a corner point, click on it and drag without releasing the mouse button.
So for example to create an L-shaped drawing, add two corners and move one corner to create the L-shape. Then move the walls to the desired measurements.

Click on the wall where you want the sloped ceiling. Then select the “Sloped Ceiling” option from the Option panel. Modify the measurements by changing the parameters Height from floor, Ceiling length or Angle.
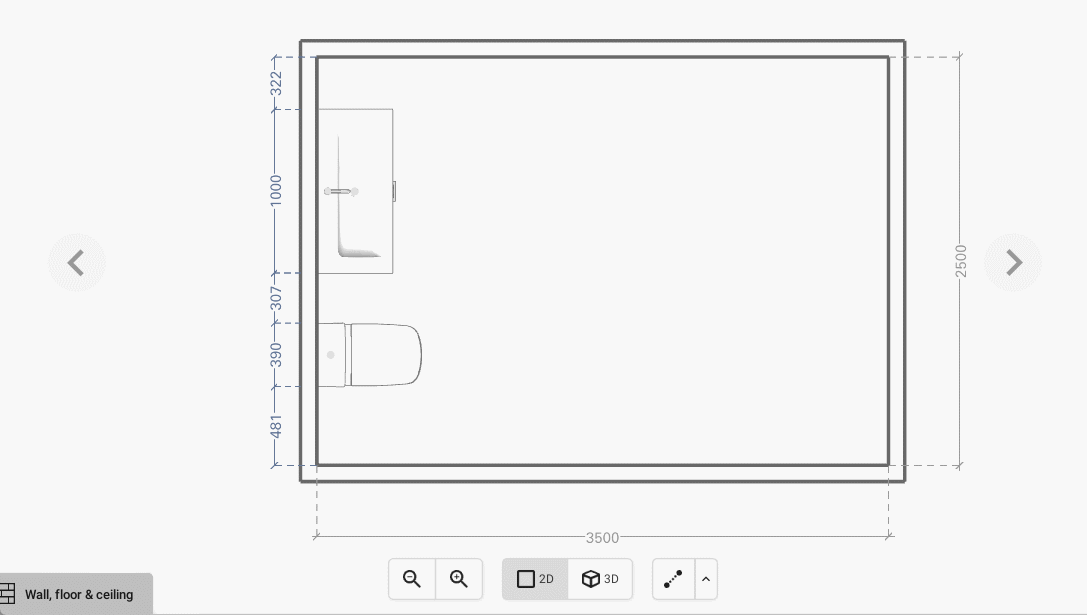
In the Palette, click on the building object you want to add into your drawing and then click where in the drawing you want to place it. You can also drag and drop the building object into the drawing.
To move the building object in the drawing, just click and drag it around to desired place. You can also nudge it with the keyboard’s arrow keys, one press will nudge it 1 millimeter at a time, but holding down Shift while pressing the arrow will nudge it 10 millimeters at a time.
Doors and windows
Doors and windows can only be placed in walls. No decoration is currently available.
Dormer window
Dormer windows can only be placed in sloped ceilings. They can be decorated with surface products.
Blocks
Blocks can be used for many purposes such as walls or built-in bathtubs. Surface products such as tiles can be placed on a block.
Recess
The recess can be placed on walls and can be decorated with surface products such as tiles.
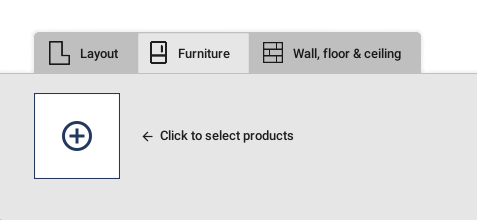
Adding furniture
To add furniture to your drawing select the Furniture tab in the Palette.

Basic actions
Click on the “+”-button to open the Select view.
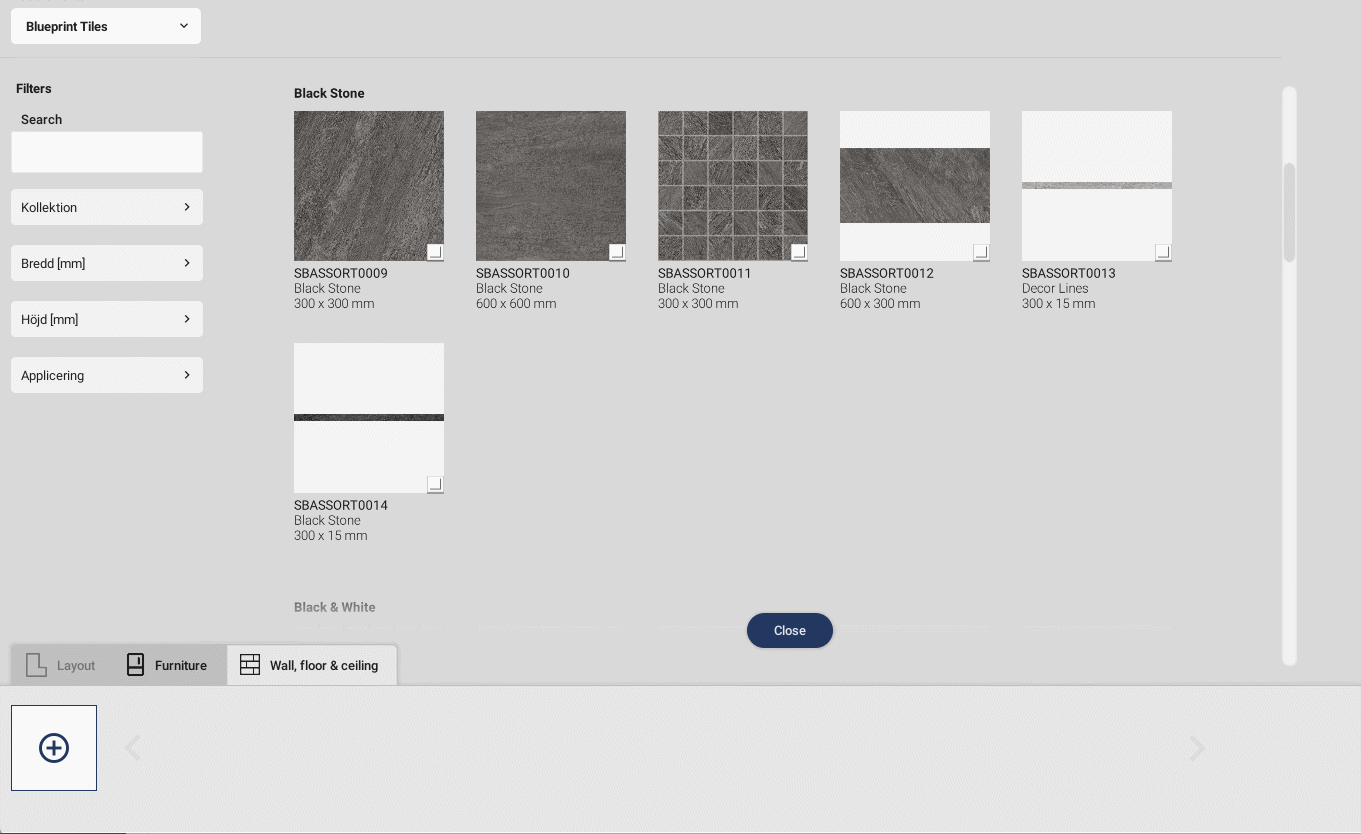
In the Select view choose an assortment in the drop down.
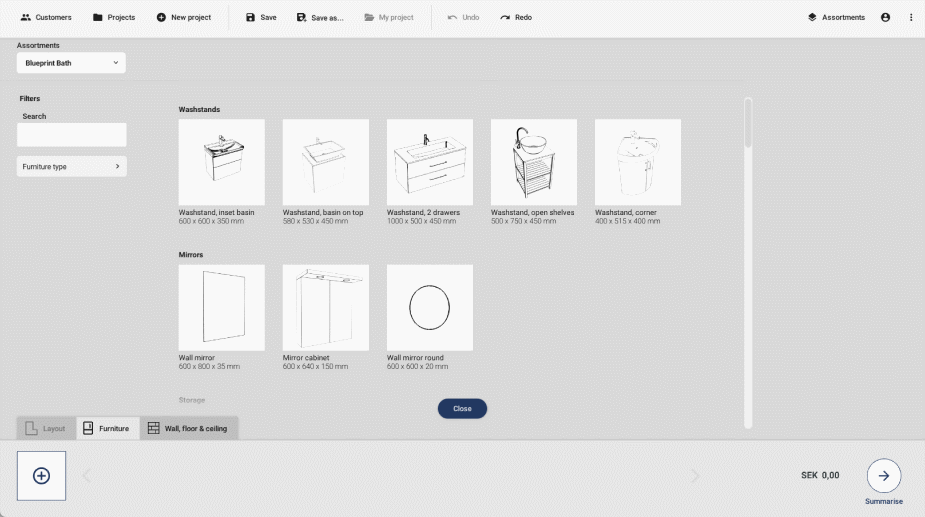
Click on one or more products to select them, these will end up in your Palette. To remove products from the Palette, just click on them in the Select view or click on the small trashcan-icon on the product in the Palette.
Place the products in the drawing by selecting them in the Palette and clicking in the drawing, or drag and drop them into the drawing. Both of these variants can be done in the 2D and 3D perspective, as shown below.
To remove a product from the drawing you can select the product and press “Delete” on your keyboard, or drag the product outside the walls of the room.
Adding products to surfaces
To add furniture to your drawing select the Wall, floor & ceiling tab in the Palette.

Basic actions
Click on the “+”-button to open the Select view.
In the Select view choose an assortment in the drop down.
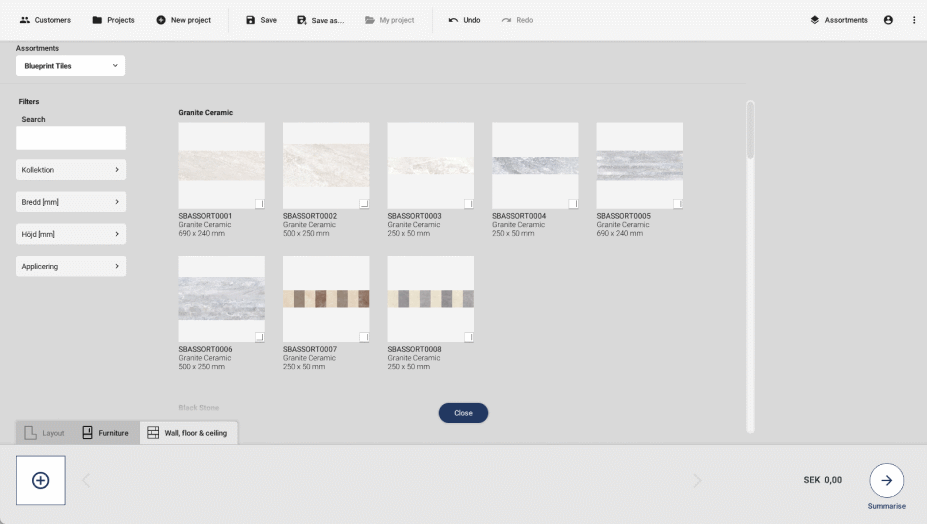
Select one or more products and close the Select view again.
Select a product from the Palette. Click and drag along a surface in the drawing to put several tiles in place.
Select the Eraser tool and then click and drag across the surface where the product should be removed.
You can also click on the product in the drawing so the Option panel appears to the right, and click “Delete” to remove it. Just make sure you have nothing selected prior to clicking in the drawing.
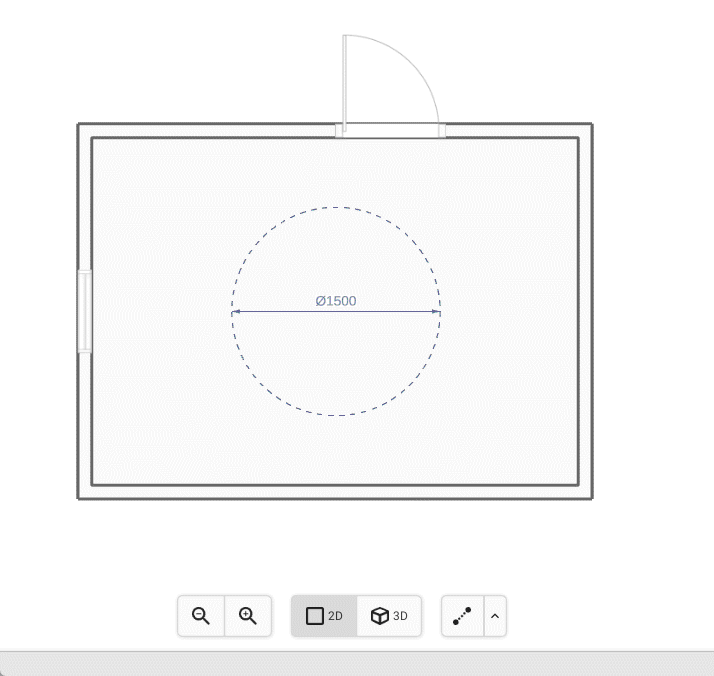
Adding measurements or annotations
To add measurements or annotations to the drawing, use the measurement-tool in the Drawing area.
Basic actions
Click on the arrow to expand the dropdown and choose desired measurement tool. The ones available are:
- Radial measure
- Diameter measure
- Horizontal measure
- Vertical measure
- Distance measure
Click on the desired tool and then click in the drawing to place it. To move it around, click and drag without releasing the mouse button.
In the Option panel to the right, which appears once a measurement in the drawing is selected, you can fill in desired metrics for the measurement but it is also possible to manually alter it in the drawing.
Remove a measurement by dragging it outside of the room, or select it in the drawing and press “Delete” on your keyboard.
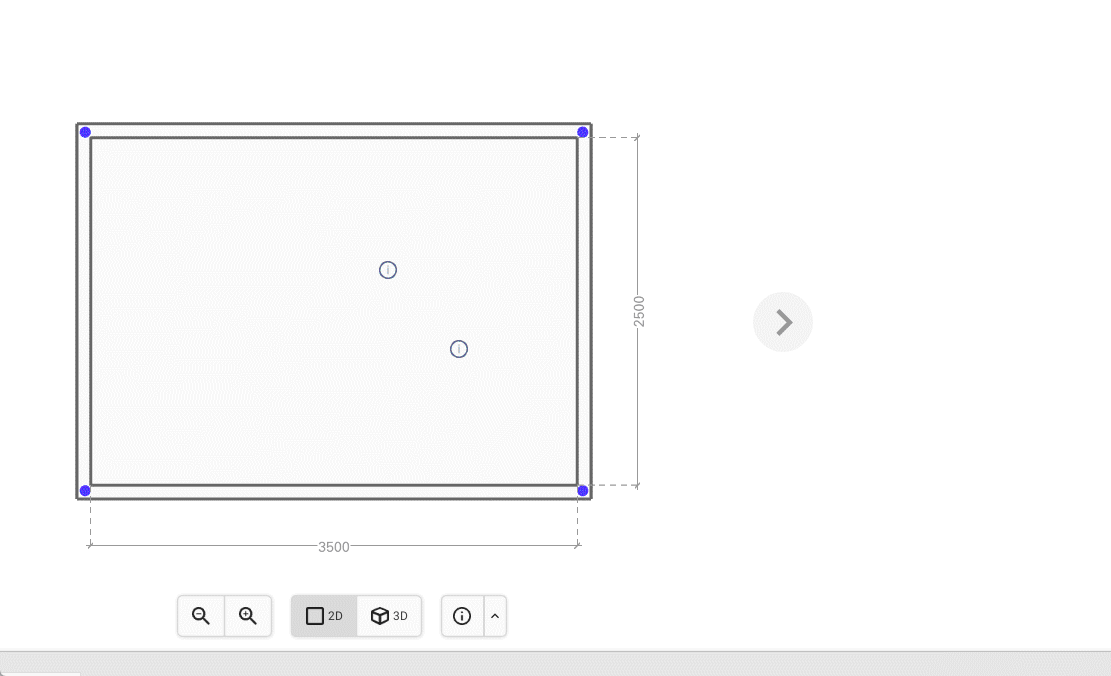
You can add annotations to your drawing that will be visible in the PDF summary. Click on the arrow and choose the Annotation tool. Then click somewhere in the drawing to place the annotation icon and fill in the annotation to the right in the Option panel. You can also change color of the icon if desired.
Remove annotations by dragging it outside of the room, or clicking on it and click “Delete” on your keyboard.
It is also possible to choose Show guideline, Automatic measure and Manual measure. All three of these buttons are toggle buttons, to either hide or show certain things in the drawing.
Show guideline
The guideline is an aid to use when tiling walls. It helps to ensure that the distance from floor/ceiling to a guideline is the same on every wall.
This guideline can be shown or hidden by clicking this button. To enable it, make sure the Wall, floor and ceiling tab in the palette is active and that you show a wall (and not the floor). Click on the arrow and select Show guideline and the guideline will appear on the walls. To move the guideline, the exact distance can be added in the option panel that appears to the right. It can be manually moved by click and drag or selecting it and use the keyboard arrow keys.
Automatic measure
Measures that are automatically added in the drawing by Spark Blueprint are shown by default, but can easily be hidden by clicking on the Automatic measure button.
Manual measure
Manually added measures are visible after added into the drawing, but can be hidden as well by clicking the Manual measure button.
Saving your work
To be able to open the drawing again, it needs to be saved. Depending on if it is the first proposal in a new project, or a proposal from an already existing project, there are different ways to proceed.
Using Save and Save As
To save your work in Spark Blueprint, use the Save or Save as buttons which are placed in the Control bar.
Basic actions
To save your drawing in Spark Blueprint there are two buttons, Save and Save as.
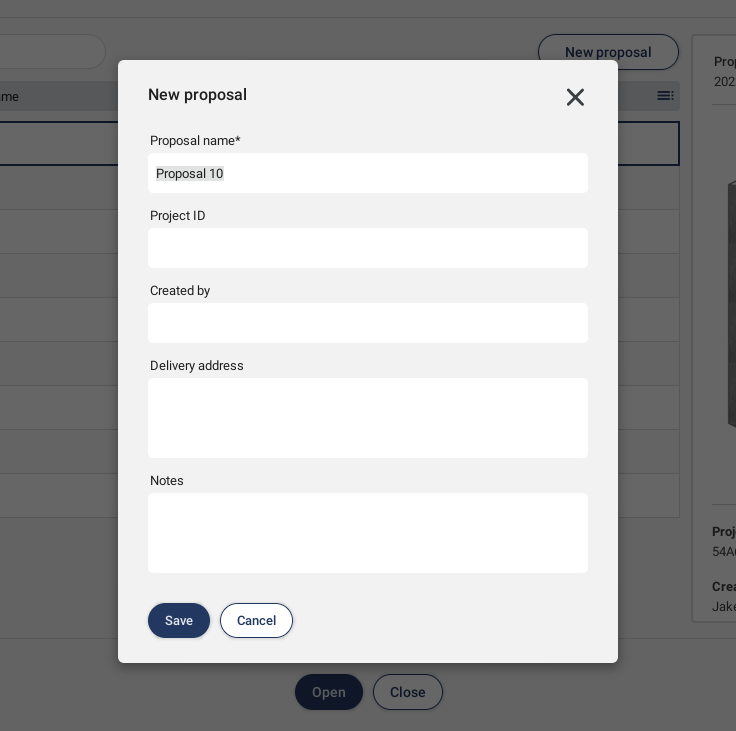
If the proposal is not connected to a project, the New project dialog will appear when pressing Save or Save as. The name of the project is required, but the other input fields are optional. Note that the name of the proposal will be automated in this stage but can be altered later on.
Click Save in this dialog to save the drawing to a new proposal within a new project.
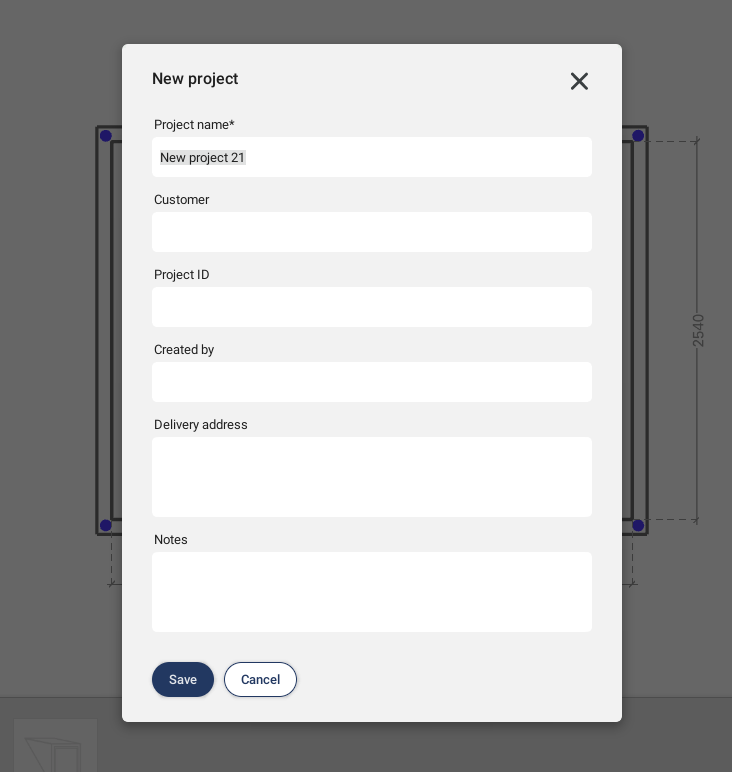
If the proposal is already connected to a project, click Save to save your drawing to the opened proposal.
Click Save as to save your active drawing to a new proposal. That will prompt the New proposal dialog, where the name of the proposal is required but the other input fields are optional.
Click Save in this dialog to save the new proposal.
Managing projects and proposals
All of your projects will be shown under the Projects button. In this view they can easily be sorted using the list or the search bar, which enables you to manage them and their accounted proposals in a simple way.
Projects and proposals
The Projects button is placed in the Control bar.

Basic actions
By clicking Projects in the Control bar, all existing projects will be listed. Besides managing project from this view, you can click New project to create a new project as well as open an already existing Blueprint Online project.
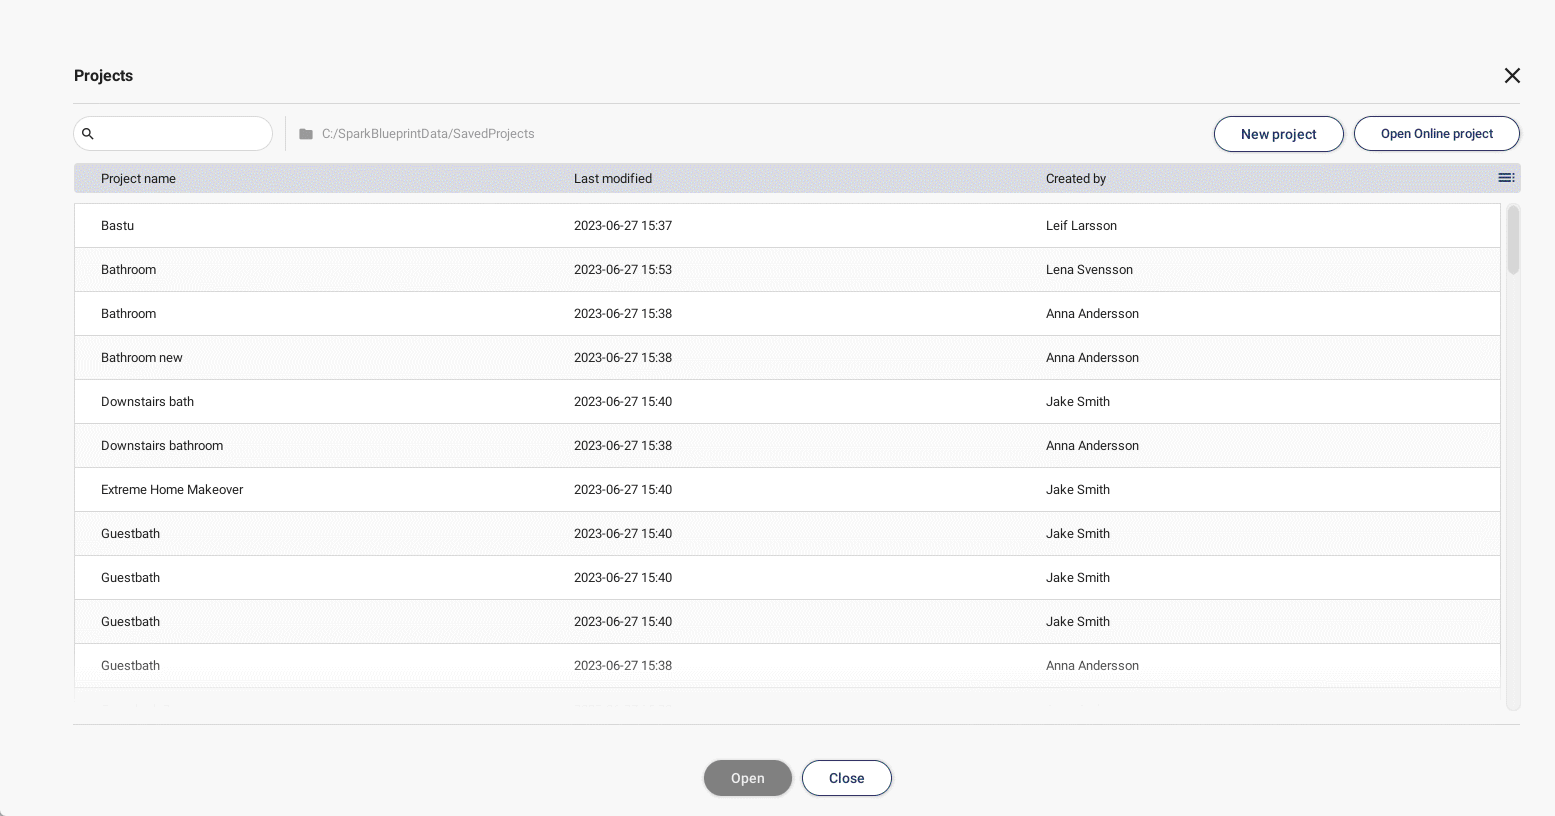
Add more columns to the list by clicking the button to the right in the column title row.
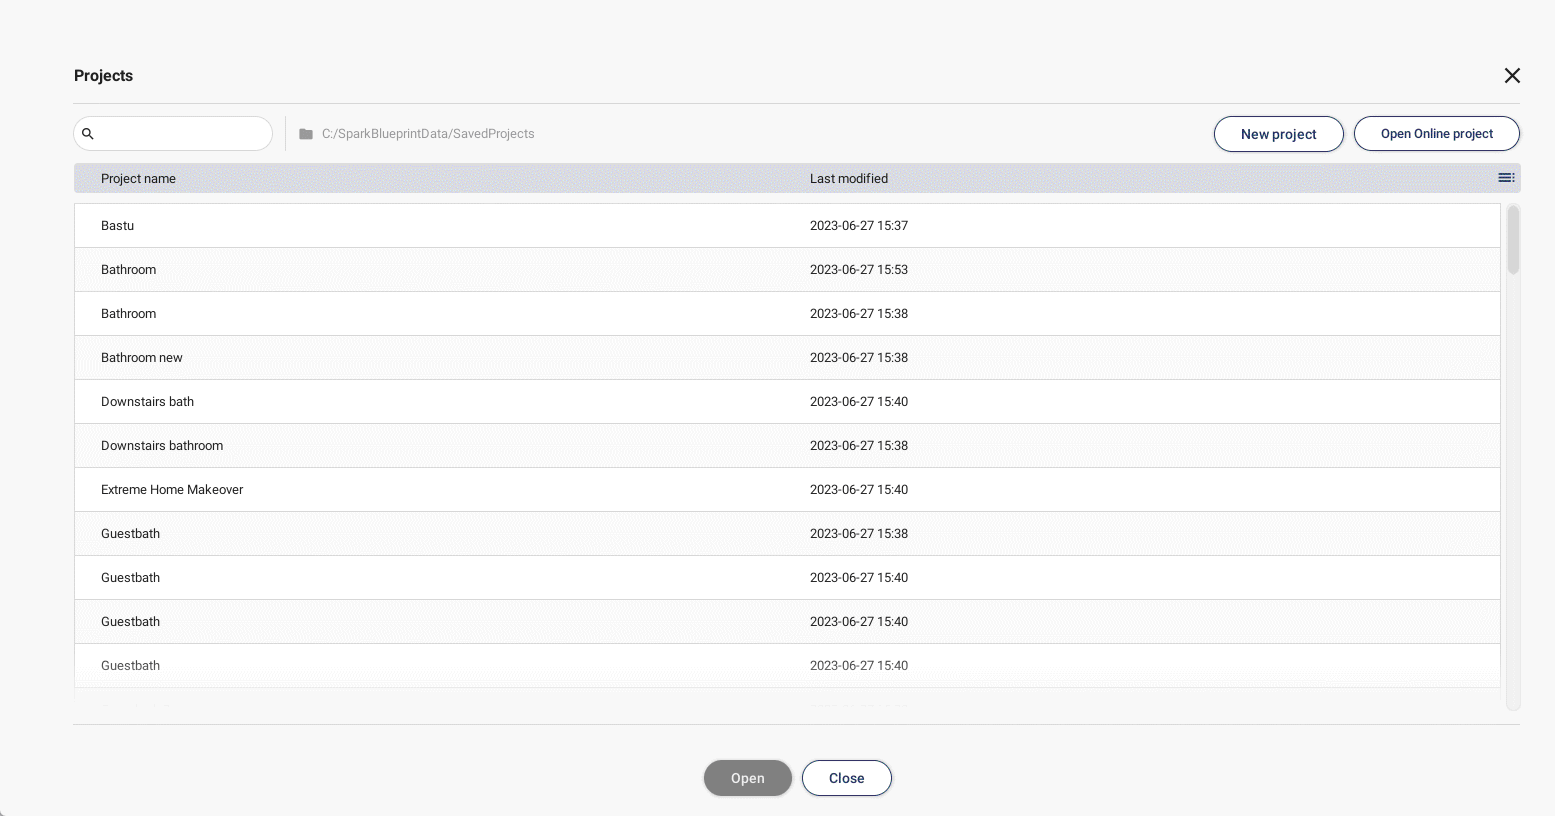
Click on the column title to sort the columns (e.g. Project name from A-Z or Z-A).

To search for a project, click in the search bar and type until desired project is found.
As mentioned, a project consists of one or several proposals of a drawing. Opening a project in the Project view shows the existing proposals within that project, that you can open and alter to your liking in the drawing view.
Open a project
To open a project, go to Projects, click on the desired project and then click Open in the bottom center. It is also possible to double-click on the row to directly move into the Project.
Open a proposal
Once you have opened a project you can open a proposal. Click on the desired proposal in the list and then click Open in the bottom center. It is also possible to double-click on the row to directly open the proposal.
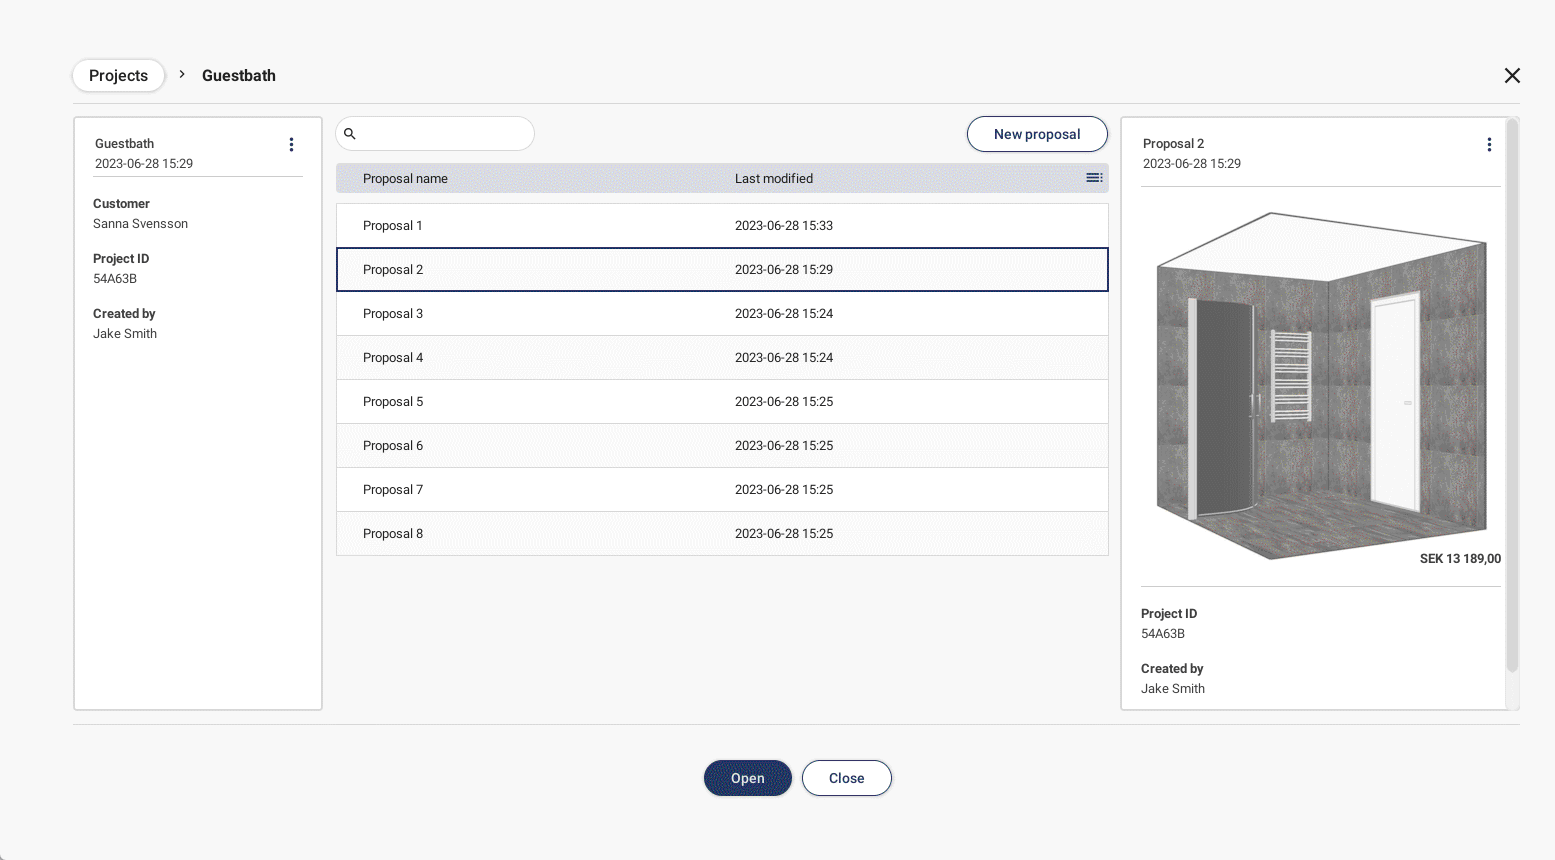
On each project or proposal, the three-dotted icon is visible in the top-right corner. By clicking this, a dropdown with buttons such as Edit, Duplicate and Delete is visible.
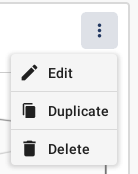
Edit the project- or proposal information
Click Edit in the dropdown to edit the information of a project or proposal. This will prompt an Edit project/Edit proposal-dialog for you to add, delete or edit information.
Duplicating a project or proposal
Click Duplicate in the dropdown to duplicate a project or proposal. This will prompt a New project/New proposal-dialog for you to fill in desired information. Don’t forget to click Save for it to be saved.
Deleting a project or proposal
Click on the three-dotted icon for either the project or proposal, and then click Delete. It is also possible to use the “Delete” key on your keyboard, just make sure that the desired project or proposal you want to delete is the one highlighted in the list. In the Edit dialog there is also a Delete button available.
When a project is active in the drawing area, the My project button can be clicked. Here you can access information about the project and its proposal(s) and easily move between proposals.
To create a new proposal, you can in this view click on New proposal placed above the list to the right, which will prompt the New proposal dialog. Once clicked on Save, the new proposal has been added to the list of proposals and can be opened if desired.
Keyboard shortcuts
Use arrow keys to nudge 1mm.
![]()
Hold down Ctrl to prevent products from snapping if placed closer than 100mm.
![]()
Hold down Shift while using the arrow keys to nudge 10mm.
![]()
Cloud Render - Photorealistic visualisation
Cloud Render creates photorealistic images of the room with one easy click. Set the appropriate perspective in Summarize and then click in Cloud Render. Using Cloud Render requires a separate license. Contact [email protected] for more information.
Contact support
If you have any questions or experience problems, please feel free to contact us at [email protected] or on +46 31 708 98 00.